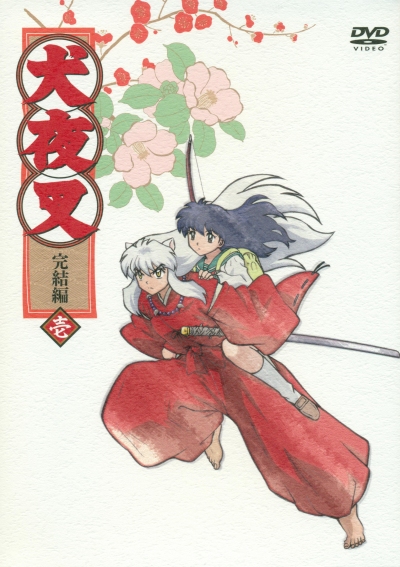
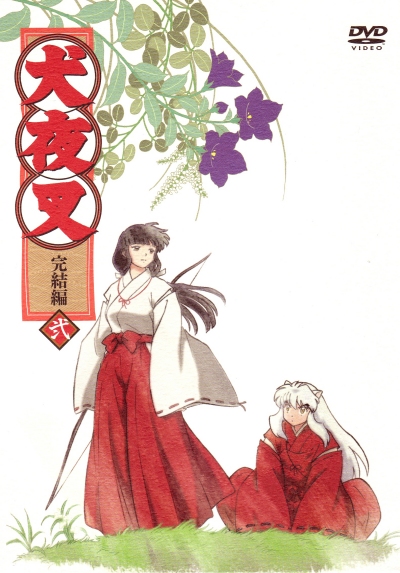
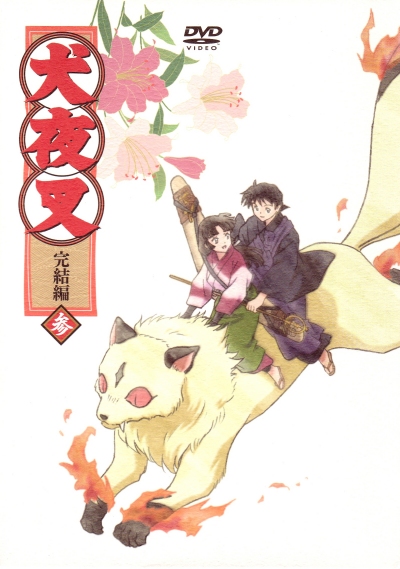
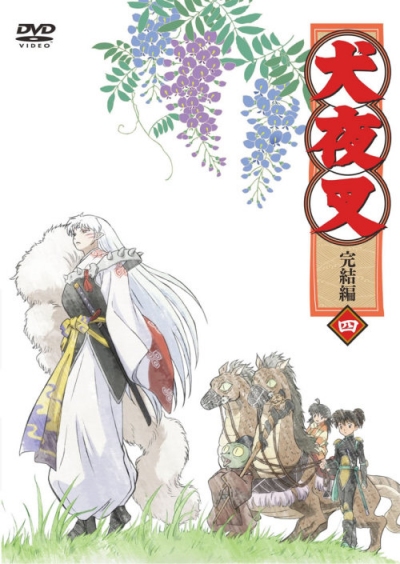
Season
overview:
The Inuyasha anime ended in 2004, without a proper ending. Takahashi continued to write the manga series for another four years, and throughout 2008 a massive retrospective and gallery show of Takahashi's previous 30 years in the business helped re-focus fan attention on her work. With the attention she gained from this, as well as a special edition of three OVAs featuring Urusei Yatsura, Ranma 1/2, and Inuyasha gaining significant fan support, it was decided that 26 more episodes of Inuyasha (now titled, Inuyasha Kanketsuhen or Inuyasha: The Final Act) would be produced. The new series debuted on Nippon Television in a new late night time slot of 2:20 AM, on Saturdays, and then was aired a few days later on Yomiuri TV. However during New Year programming an episode was delayed on Nippon TV, so the Yomiuri episode then became the "first aired" on Monday mornings at the beginning of 2010 with episode 14. Inuyasha: The Final Act still continued to run on both channels, however the network that carried the earliest episode shifted from Nippon TV to Yomiuri because of this and we reflect that in the air dates.
Episode 1: 奈落の心臓
Naraku no shinzo (Naraku's Heart)
Kagura guards Goryomaru under orders from Naraku. As she looks on demons attempt to attack him and he fights back, easily killing them. She begins to question him when Hakudoshi interrupts them and asks if she is having second thoughts of betraying Naraku. Hakudoshi promises to retrieve Kagura's heart before he kills Naraku. Meanwhile in Kaede's village, Shippo transforms into Miroku so that Miroku can leave on his own and meet some girls. Sango catches him just in time and bashes him with her Hiraikotsu. In the present, Kagome works on a make-up test alone in her classroom while her friends wait outside. Inuyasha shows up at school looking for her and meets her friends instead, answering a few of their random questions. Just as Kagome is about to solve one of her math problems, she sees Inuyasha and "sits" him. The teacher tells her that every answer is wrong, and she passes out, forcing Inuyasha to carry her home with her friends following along. Kagome and Inuyasha jump into the well upon arriving at the shrine and travel back to the Feudal era. In the past, Jaken, Sesshomaru and Rin are tracking Naraku's heart. After passing through the well, Kagome and Inuyasha are attacked by Hakudoshi. The Saimyosho carry away Kagome's jewel shard and Hakudoshi escapes. Kagome innsists they follow along. Somewhere, else Koga, Ginta and Hakkaku rush headlong into a waiting, and speaking, Moryomaru. At a local village, a warning bell is rung signalling danger as a huge wolf attacks. Kohaku easily decapitates the wolf but its head lives on, possessed by another demon. Kohaku meets up with a woodsman and his son Taichi. Taichi is possessed and begins to attack his father, forcing Kohaku to attack the boy. Kohaku saves the boy, and Kagura appears to slay the demon. Afterwards she suddenly moves to attack Kohaku. Koga fights Moryomaru, but is easily overcome, as an arrow blasts through the demon and sends him fleeing. The arrow belongs to Kikyo, who notices that Moryomaru has gained a soul. As the sun goes down, Kohaku is still on the run from Kagura. She's hunting him for the shard in his back, determined to turn it over to Hakudoshi in order to gain his trust and her freedom. Kohaku pleads with her to use him to slay Naraku. As they follow Hakudoshi, Kagome senses Kohaku's shard and the group interrupts his conversation with Kagura. Naraku is watching through Kanna's mirror and witnesses her letting Kohaku escape. Hakudoshi arrives and Kagura protects Kohaku, attacking Hakudoshi. Inuyasha saves Kagura just in time while Sango pursues Kohaku. Suddenly Goryomaru appears and attacks Inuyasha before transforming into Moryomaru. Hakudoshi gives him Kagome's jewel shards, enabling Moryomaru to grow wings. Hakudoshi captures Kagura and attempts to escape. Before leaving, Kagura tells the group that Naraku has hidden his heart within the Infant, and the Infant has been placed inside Moryomaru. Kagura rages against Hakudoshi, while Naraku listens in, and just as Hakudoshi admits he plans to overthrow Naraku, Naraku uses his control over the demon child to force his shield to drop. Miroku wastes no time in preparing his Wind Tunnel. Kagome asks Kagura to join them, but she refuses. The group rushes after Moryomaru as Sango continues to search for Kohaku. Moryomaru finds him first and is about to remove his shard just as Sango arrives. When Kohaku calls out to her she realizes that he has his memory back. Inuyasha attempts to kill Moryomaru, but misses his chance, as the brother and sister demon slayers share a tearful reunion. A weakened Kikyo waits with Kocho and Asuka in a forest and realizes that she won't surive long enough to slay Naraku herself.
Episode 2: 神楽の風
Kagura no kaze (Kagura's Wind)
Kohaku and Sango lay flowers on the grave of their father and clansmen while Miroku, Myoga, Kagome, Inuyasha and Shippo investigate Midoriko's gave. Inside they find a barrier protecting Midoriko's corpse, and within the wound of her chest, a chrysalis grows. Inuyasha sends the others away that night while he stands guard. Eventually a Shinidamachu emerges from the chrysalis and carries Midoriko's soul away. Inuyasha follows and finds Kikyo, who is purifying herself as she awaits the soul. Meanwhile, Moryomaru finds Meioju, a powerful demon with an impenetrable shell, and easily absorbs him, gaining his power for himself. Inuyasha meets with Kikyo, who tells him that the wound she received at Mount Hakurei from Naraku is still not healing properly, however once she absorbs Midoriko's soul, the wound disappears. Instantly, Kohaku senses something and rushes out of the hut, away from the others and in the direction of Kikyo. He arrives just in time to hear Kikyo telling Inuyasha of her plan to gather the remaining jewel shards, letting Naraku complete the Shikon Jewel so that it can be purified in his possession, ultimately killing him. As Kikyo leaves, Kohaku follows, willing to sacrifice his life to help Kikyo's plan. Meanwhile, Koga, Ginta and Hakkaku enter the graveyard of the Wolf-Demon Tribe in search of a powerful weapon, the Goraishi. Koga battles a guardian demon and eventually triumphs, earning the weapon in hopes of using it against Moryomaru and Naraku in his quest for vengeance. Kagura floats through the air and encounters Naraku, who comments on Hakudoshi's demise and admits he knows that Kagura was planning to betray him too. With that, Naraku returns Kagura's heart to her and then instantly runs her through with his tentacles, injecting her with his miasma. He leaves Kagura to float away and die. Meanwhile, Sesshomaru has encountered Moryomaru and begins to battle. Every attack that Sesshomaru throws at the demon is absorbed and then used against him. Moryomaru taunts Sesshomaru before attempting to absorb him completely. In a nearby field, Kagura lands and realizes that she will soon die. The wind carries her scent to Sesshomaru, who suddenly begins to pump his demonic energy into Moryomaru, giving him more than he can handle. Sesshomaru strikes with the Tokijin, breaking his sword and sending Moryomaru fleeing. Sesshomaru goes to be by Kagura's side as she dies. She finds comfort in knowing that he came to see her, and dies happy, her body disappearing as a strong gust of wind blows through the field. Inuyasha and the others arrive too late, and only learn that Kagura was smiling as she died.
Episode 3: 冥道残月破
Meido Zangetsuha (Meido Zangetsuha)
Sesshomaru reflects on his final meeting with Kagura when suddenly Totosai appears before him. The old demon comments on the loss of Tokijin and says its for the best, as he tells Sesshomaru that as his heart has changed, it is time to reforge Tenseiga into a weapon. Meanwhile, back at Kaede's village, everyone is resting. Sango is depressed over Kohaku's decision not to join them. Miroku tries to comfort her, and they discuss Kikyo's plan to re-create the Shikon Jewel at the cost of Kohaku's life. In the present, Kagome and her friends drop off letters of intent at their high school of choice while Kagome goes home to study in hopes of pulling her grades up before the high school entrance exam begins. That night Grandpa tells her a story of the fate of the Shikon Jewel, but Kagome is too distracted with her studies to listen closely. Eventually Inuyasha arrives to take her back to the past. When she returns, the group sets off to find Naraku, but comes into contact with a group of kitsune in the forest. They make camp within an inn where the kitsune's ranking exam is taking place. All through the night numerous fox demons along with Shippo attempt to increase their rank as kitsune by torturing Inuyasha and playing pranks on everyone else. Inuyasha swears revenge and sets off to make Shippo pay. As they meet in the pre-dawn hours Shippo tricks Inuyasha once more before making his escape. After running away, Shippo encounters a beautiful demon badger, Mujina, who enlists his aid in stealing the demonic power of Tessaiga, using her own sword, the Dakki. Once she has absorbed the power of the Wind Scar, Mujina turns on Shippo and attacks Inuyasha with it, promising to rule the world. However, Mujina is unskilled at wielding the powerful technique and Inuyasha makes short work of her, revealing that she is in fact a middle aged, male badger demon in disguise, much to Shippo's disappointment. Inuyasha inspects Mujina's blade, and decides it may be time to visit Totosai to learn more about the sword's absorbing power. Meanwhile, Totosai watches on as Sesshomaru uses his upgraded Tenseiga to cut a huge ogre in half by cutting a direct path to the underworld.
What does "Meido Zangetsuha" mean? Meido (冥道, literally "dark path", though sometimes it is also written as "冥土" "dark earth") is a complicated concept that does not make for easy comparisons in Western religion. Some may call it a purgatory, which in a sense it is. It is intended to be a liminal space, a place one travels through on the route towards ultimately being sorted into going to "Tengoku" a heaven where one is further sorted for reincarnation or "Jigoku" a place where a soul is tortured and labors until they are deemed worthy of once more being allowed to reincarnate. Meido is the location of the Sanzu River that a soul must cross. In some sense the afterlife commonly shown in Takahashi's next series, Kyokai no RINNE can be said to be "meido" (though a very peaceful, idealized version). In Inuyasha it is shown primarily as an empty, dark place. In Buddhist teachings it is a torturous place filled with obstacles that must be overcome that even nominally "good" souls must deal with. A detailed description of Meido can be found here.
The second half "Zangetsuha" (斬月破) is a made-up compound word. It is written with the kanji for 斬 (beheading) 月 (moon, as in the crescent moon it resembles) and 破 (rip, tear, destroy). The "ha" (破) at the end is the same that is in Inuyasha's "Bakuryuha" (爆流破) and Ranma Saotome's "Hiryu Shoten Ha" (飛竜昇天破).
Episode 4: 竜鱗の鉄砕牙
Ryuurin no Tessaiga (Dragon-Scaled Tessaiga)
Sesshomaru continues to test his upgraded Tenseiga, felling three ogre's in one blow. As he reflects upon making his Meido Zangetsuha technique stronger, Inuyasha arrives at Totosai's lair to ask him about the Dakki's power. Totosai tells Inuyasha that the sword Mujina possessed was a weak copy of the actual Dakki and that he should stay away from the real sword, as it could possibly absorb Tessaiga's demonic energy and leave the blade stuck in its rusty, useless form. Inuyasha fails to heed his warning and goes in search of the Dakki. In a crowded village, a swordsmith named Toshu completes his reforging of the Dakki just as its supposed owner, a dragon demon named Ryujin arrives to claim it. Toshu was supposed to turn over the blade to Ryujin long ago, but has been on the run in hopes of making the blade strong enough to protect him against Ryujin. Just as the dragon demon is about to strike, Inuyasha arrives to protect Toshu. He engages Ryujin in combat, but the Wind Scar fails to do any damage against Ryujin's dragon scaled shield. At the same time, a wolf demon cub and his older brother are attacked by a huge red demon under the command of Byakuya, Naraku's newest minion. The demon captures the young cub, Shinta, and Byakuya promises to release him if his brother, Kai will find Koga and slay him. Back at the village, Ryujin finally attacks and Inuyasha uses the opportunity to unleash the Backlash Wave, which finally does the trick and injures Ryujin. Wasting no time, Toshu strikes and absorbs all of Ryujin's demonic energy into the Dakki, quickly turning against Inuyasha in hopes of using his powerful sword to absorb the energy within Tessaiga. Meanwhile, Kai tracks down Koga, but is no match for the swift demon. Instead Koga trails him and finds the red demon, quickly slaying him. Before Koga can attack Byakuya, he escapes with Shinta as Inuyasha continues to lose his battle against Dakki. Tessaiga begins to crack under the assault of the evil blade. Wind gushes forth from the damaged Tessaiga in an attempt to protect itself from Dakki. Eventually, Dakki wins the day and absorbs all of Tessaiga's energy. But the power of Tessaiga is too much for the sword, and it expels the energy into Toshu, killing him before the sword itself shatters and Tessaiga is restored. Inuyasha notices that Tessaiga now has Dakki's absorption abilities, which manifest themselves in dragon scales along the blade. As he ponders his newly upgraded weapon, Inuyasha and the others spy Ginta and Hakkaku running nearby. Kagome senses numerous Shikon shards and the group quickly pursues. They arrive to find Koga in battle with Moryomaru, who has captured Shinta. Kai and Koga are both quickly captured as well as Midoriko's will overtakes the shards in Koga's legs, freezing him in place. Inuyasha arrives just in time to save the wolves, as Kirara and Sango grab Shinta from Moryomaru. Inuyasha attempts to use his Adamant Barrage but Moryomaru easily absorbs the attack and uses it for his own cause. Inuyasha has no choice but to use the Dragon Scaled Tessaiga, to absorb Moryomaru's energy, but as soon as he does, the sword backfires, injuring Inuyasha in the process. It is only through the combined assault of Koga's Gorashi, Inuyasha's Tessaiga, and one of Kagome's arrows in the wound Sesshomaru inflicted in his previous battle with Moryomaru that the demon is finally sent running. Byakuya observed the entire battle and left to report both Moryomaru's injury and Tessaiga's new weakness to Naraku.
Episode Staff:
Director: Yasuo Iwamoto (いわもとやすお)
Animation Director: Hideaki Shimada (しまだひであき) & Taeko Oda (小田多恵子)
Episode 5: 妖霊大聖の試練
Yoreitaisei no shiren (The Great Holy Demon Spirit's Test)
Kikyo wanders through a misty forest when she is suddenly approached by Kohaku. She tells the boy that she could sense his presences due to his Shikon Shard. Kohaku kneels before her and tells her he wants her to use his shard. She responds by telling him that means he will have to forfeit his life. Kohaku agrees. Kikyo seems taken aback by his certainty, and as they walk together she reflects on the fact that her duty as a miko would have her to save his soul and help him rather than use him as a sacrifice to complete the Shikon Jewel. Meanwhile Koga bids farewell to Ginta and Hakkaku along with Shinta and Kai and heads out on his own, no longer wanting to endager the Wolf Demon Tribe. Away from everything, Moryomaru watches the distant horizon and spies two twin brothers, Kinka and Ginka battle one another. The two demons are joined at their tail and battle to see which one will inherit their shared body in full. The Infant tells Moryomaru to slay the brothers and use their blood to strengthen the bond of his shell to his body. Moryomaru wastes no time and bluffs the brothers into attacking him. As soon as they think he is defeated they turn on one another again and Moryomaru is able to absorb them both with ease. Byakuya witnesses this only to find that Sesshomaru is watching him as well. Sesshomaru wastes no time in engaging Moryomaru in battle, ready to test the Meido Zangetsuha technique. As soon as he uses it however, Moryomaru attempts to escape and Byakuya, under orders from Naraku, aids him by distracting Sesshomaru. Meanwhile Totosai tells Inuyasha that the Tessaiga has grown too powerful for him to continue to handle safely, and in order to master the sword's new ability he will have to receive training from Yoreitaisei, a great demon. Inuyasha and the others visit a human village and find Yoreitaisei living amongst them in secret. Unfortunately due to a battle the previous night, Yoreitaisei has become a fluttering sheet of skin, having all his guts sucked out by the demon he fought. Inuyasha is charged with finding the demon and slaying him. Unfortunately, the demon has used an illusion to make all of the human villagers appear as demons in order to hide amongst them. Yoreitaisei insists that Inuyasha must not hurt the humans, and so binds Tessaiga in mystical chains which prevent Inuyasha from using the sword. As Inuyasha and the others move through the village they learn that if Inuyasha attacks innocent people or demons unrelated to the one that devoured Yoreitaisei's guts, the chains on Tessaiga will increase. On the run from the villagers who begin to pursue the group, a young human boy, Gennosuke, hides them in his home hoping they can help his mother who has been transformed into a snake demon. Upon meeting her, she instantly attacks Inuyasha and reveals herself as the demon Yoreitaisei fought. Inuyasha is unable to use his numerous attacks against her, but Yoreitaisei tells him he must attack the invisible vortices of demonic energy that swirl around her. Inuyasha concentrates and is able to see the a few vortices of energy swirling but cannot determine which is the correct one to attack. Using his sense of smell he finally makes the right choice and the demon and her son disappear, but the village remains untransformed and Inuyasha and Kagome head forward to find the true culprit. Upon entering Yoreitaisei's home they find the old demon crumpled into a ball, dead at the hands of an Ox Demon. The Ox tells Inuyasha that he has completely absorbed Yoreitaisei's power and that Inuyasha has no chance of defeating him, even if he can view his demonic energy vortex. Inuyasha struggles, but finally realizes that the true vortex is within Yoreitaisei's corpse. Upon striking it, the illusion falls and Yoreitaisei reappears, revealing the entire battle to be a hoax in order to train Inuyasha in the proper use of the Dragon-Scaled Tessaiga.
Episode 6: 魍魎丸の最期
Moryomaru no saigo (The End of Moryomaru)
Fifty years ago, Yomeiju the demonic tree indescriminantly devoured both humans and demons who approached it, until Kikyo was summoned to seal the evil tree away. In recent days, leaves have started to sprout and the tree has begun to murder passersby once more. After a priest is killed, Inuyasha and the others find themselves dealing with the tree. Kagome instantly notices that within Yomeiju is a Shikon shard. Just as Inuyasha is about to strike, Naraku appears and blocks his Wind Scar with his barrier. Yomeiju suddenly springs back to life and attacks Naraku, happy to devour such a powerful demon. Naraku does not fight back, but instead uproots the tree and takes to the sky where instead, he absorbs it. Meanwhile, Kikyo and Kohaku continue their hunt for Moryomaru, and encounter Koga who is also looking for the powerful demon. Kikyo is knocked from a cliff, seperated from Kohaku and finds herself face to face with Koga. She attempts to shoot an arrow through his legs in order to gain his Shikon shards, but he is too fast for her. Instead he runs away in pursuit of Moryomaru, who is headed for a direct confrontation with Naraku. With the two demons finally meet, the power of their miasma destroys an entire forest below them. They begin to battle, and Moryomaru seems to destroy and absorb Naraku with little trouble. Inuyasha and his group arrive to witness the fight, and Kagome senses Koga's shards as well as Kohaku's nearby as well. Inuyasha and Koga team up to try and vanquish the victorious Moryomaru, while Sango and Kagome go to meet Kikyo and plead with her not to follow through with her plan to sacrifice Koga and Kohaku to complete the shard. She seems reluctant, but agrees to give Inuyasha an opportunity. Moryomaru seems invincible now that he has defeated Naraku and gained his almost completed Shikon Jewel. However, just as all hope seems lost, Naraku reappears inside Moryomaru to threaten the Infant. Naraku uses the barrier breaking tendrils of Yomeiju to reach the Infant and begin to absorb him, just as Moryomaru begins to rip the shards from Koga's legs. Kagome returns and fires an arrow, hoping to free Koga, and the combined power of her holy arrow and the Wolf Demon Tribe Elders allows Koga to espcape, as everyone witnesses the death of Moryomaru, as Naraku re-emerges from within, the Infant now his captive. Enraged, Miroku opens his Wind Tunnel in an attempt to finish Naraku once and for all. As he does, he absorbs massive amounts of miasma. Miroku refuses to give in, even as blood pours from his mouth and eyes. He manages to absorb the Fuyoheki, but not Naraku or the Infant. Inuyasha rushes to his side and forces his hand closed. Naraku tells them that they have missed the perfect opportunity to kill him, and that they will soon regret their decision. As he disappears, Kikyo rushes to see if she can help Miroku, but finds that his wounds are severe. Naraku's poison has almost reached Miroku's heart.
The anime adaptation says that it was Kikyo who sealed Yomeiju 50 years in the past. The manga simple established that the creature was sealed by a nameless priest.
Regarding the items affixed to Yomeiju, these are shimenawa (標縄), "enclosing ropes". They are made to ward off evil spirits. They are typically placed around yorishiro (依り代) which are objects capable of attracting spirits such as trees.
Hanging from the shimenawa are zig-zag pieces of paper called shide (紙垂). They are often hung from shimenawa or are attached to the wands of shinto priests for purification ceremonies.
Episode 7: 梓山の霊廟
Azusayama no reibyou (Mausoleum of Mount Azusa)
The night following the battle with Moryomaru has everyone recovering from their injuries. Koga has remained with the group for now, even though Inuyasha is encouraging him to give up his Shikon Shards and rejoin the Demon Wolf Tribe. Meanwhile, Kikyo is absorbing the miasma from Miroku's body into her own. Sango is puzzled to see her trying to save Miroku when she seems set on sacrificing Kohaku in order to kill Naraku. As Kikyo finishes healing Miroku's wounds, he awakens and learns that if he uses his Wind Tunnel many more times, the remaining poison in his body will spread to his heart, killing him instantly. He pleads with Kikyo not to share this information with anyone else, especially Sango. Kikyo agrees, and she and Kohaku set out on their own again. Naraku has returned to Mount Hakurei and reabsorbs the human part of his heart, knowing that the hatred for Kikyo that lies within his humanity is the only thing that can protect him from the pure light within Kohaku's shard. The next day, Kikyo and Kohaku enter a village that is suddenly engulfed in Naraku's spider webs. Should Kikyo touch even one, she will be contaminated by Naraku's demonic energy. Unfortunately, she is forced to touch the webs in order to save the life of a child. But not before sending a butterfly carrying her scent to Inuyasha and the others. When they arrive, Kagome is the only one who is able to see the webs, and rushes forth to help Kikyo. Both Inuyasha and Kikyo are trapped within a small shrine, and soon after Kagome joins them. Upon entering, Kikyo gives her her bow, and tells Kagome she must wield it in order to purify the new wound she has recieved from touching Naraku's webs. However, when Kagome holds the bow, the string breaks, as she too has been contaminated by Naraku. Irritated that Inuyasha has once again rushed to Kikyo's aide, she tells him she doesn't want to see him, as she sets off on a quest with Koga and the others to purify herself at Mount Azusa and retrieve a new powerful bow. As the group arrives at Mount Azusa they realize that only Kagome can climb the stairs that lead to the mausoleum where the bow is kept. As Kagome climbs, she encounters the guardian of Mount Azusa, a white-haired woman dressed in robes who hides her face. Meanwhile, Kohaku is alone under the protection of Kocho and Asuka, Kikyo's shinigami assistants. Byakuya arrives to kidnap Kohaku, and kills the two girls in the process. Kohaku runs but is caught and injected with Naraku's miasma. Sesshomaru arrives just in time to drive Byakuya away. Kikyo senses the danger that Kohaku is in and she and Inuyasha head off to look for him. Meanwhile on the mountain, the guardian has taken the form of Kikyo and is testing Kagome with illusions in order to see if she truely desires to save Kikyo or not. Kagome is able to overcome her feelings of anger at Kikyo and admits that she does not fear Kikyo, but instead that Kikyo must fear her relationship with Inuyasha. With that admission, she is able to claim the bow, but begins to fall from the side of the crumbling mountain. When Byakuya returns empty handed to Naraku, he asks his master what his next move will be. Naraku replies that it is time to kill Kikyo.
Episode 8: 星々きらめきの間に
Hoshi boshi kirameki no aida ni (Among the Twinkling Stars)
Freed from Naraku's spider webs, Kagome falls from the top of Mount Azusa. She plummets through the cloud line and falls down to the stairs leading up the mountain. Luckily Inuyasha manages to see her and grabs her just in time. Noticing the bow in her hands, Inuyasha takes her to see Kikyo. On the way there, Kagome tells him about her visions on the mountain, and that she had thought the worst of Kikyo. Inuyasha says that no longer matters, as she still wanted to save Kikyo even after all that. Meanwhile, at the base of the mountain, Kikyo is still suffering from the effects of Naraku's spider webs. Suddenly she begins to float in the air as the webs yank her upwards. As Miroku, Sango, Koga and Shippo try to save her, they are all entwined the webs and yanked upwards. Kikyo pleads with Koga to run away, as she knows that Naraku is after his two shards. Koga refuses, and once Naraku is in view, he attacks him. Naraku clings to Kikyo, taunting her as she nears death, telling her that Inuyasha won't arrive in time to save her. Kikyo notices that the shards in Koga's legs are purified, and that as soon as Naraku touches them, his body will begin to purify itself. Hoping that Naraku won't notice in time, Kikyo's gamble works, Naraku's tentacle burrows into Koga's leg, and is purified as soon as it touches the shard. Naraku instantly pulls back, but is injured nonetheless. Suddenly, Inuyasha arrives and chops at Naraku's arm, hoping to free Kikyo. The Tessaiga isn't powerful enough however, and so Inuyasha transforms it into its Dragon-Scaled version, and cuts Naraku's demonic vortex. Suddenly, his body rips open, and a portal of darkness emanates. Within the darkness, Kagome can see the Shikon Jewel. Naraku suddenly drops Kikyo and Inuyasha is prevented from delivering a killing blow as he rushes to catch her before she hits the ground. Koga uses this opportunity to rush Naraku again, knowing that his shards are pure and protected from Naraku's grasp. As he leaps to the dark portal containing the Shikon Jewel however, Kagome suddenly realizes that Naraku does not have the Jewel within his body, but it is too late. Naraku captures Koga and begins to coat him in miasma to taint his shards. Miroku sees no other choice but to use his Wind Tunnel, risking his life in the process. Naraku taunts him, that he will do nothing but absorb his poisonous miasma. Miroku agrees, stating that this is in fact what he wants to do. Naraku notices that Koga is now free to attach him with his Goraishi. Kagome begins to search for where Naraku has hidden the Shikon Jewel when she suddenly notices that it is now within Kikyo's body. Kagome realizes that she must use her bow and arrow to purify the Jewel within Kikyo, but just as she prepares to strike Naraku unleashes a final attack against the injured Kikyo as well as knocking Kagome from the side of the cliff where she was standing. Suddenly, Kikyo's Shinidamachu appear, catching Kagome and letting her stand to fire her arrow from atop them. Her arrow hits the Jewel within Kikyo and then pushes it up back into Naraku's body. In a desperate attempt to cling to life, Naraku releases his miasma as the Jewel re-enters him, poisoning it just enough to keep him alive. His body begins to fall apart, and Inuyasha and Koga attempt to get away, but Naraku grips Koga's legs with a tentacle and rips the shards free. Now in possession of all but one shard, Naraku taunts Inuyasha, and says he will be interested to see how he gets along without Kikyo. Suddenly Inuyasha realizes that Kikyo is very near death. Naraku disappears and Inuyasha rushes to Kikyo's side. In the distance, Kohaku is travelling with Rin and Jaken, as Sesshomaru walks ahead, proclaiming that it is too late for Kikyo. Kaede realizes this as well as she sees Kikyo's Shinidamachu passing in front of the blood red sunset. That night, everyone mourns as Inuyasha cradles Kikyo in his arms. They remember the promise they made to one another to live together as an ordinary man and woman, before Naraku tore them apart. As they share a final few words and a kiss Kikyo's body disappears in a bright light, her soul finally at peace.
Episode 9: 冥界の殺生丸
Meikai no Sesshomaru (Sesshomaru in the Underworld)
After the death of Kikyo, Inuyasha is still deep in mourning. Kohaku has learned of her death as well and feels sad that he wasn't with her as she passed on, but instead he has remained with Sesshomaru, Rin and Jaken. Sesshomaru stands silently as the others watch him, wondering what he is waiting for. He watches the sky and suddenly sees a large demon fly past. Sesshomaru transforms into his fully-demonic state and flies toward the demon who looks much like him. The two encircle one another and crash back to the ground nearby. As Jaken and the others rush to his side, they see Sesshomaru standing with a beautiful woman with white hair. Sesshomaru begins to ask questions about developing the power of the Tenseiga, asking the woman if his father told her anything about it. The group soon learns that this woman is Sesshomaru's mother. Meanwhile, Koga, Ginta and Hakkaku have rejoined Inuyasha's group. They learn that Koga has lost the shards in his legs to Naraku. Koga feels as though he is no longer able to fight against Naraku, and has decided to go his own way. He tries to tease Inuyasha into reacting, but he's still too depressed to get angry with Koga's harassment. Koga says goodbye to Kagome, and as he turns to leave, Inuyasha tells him that all his fighting won't be in vain, that he, Inuyasha, will slay Naraku and get vengance for the Wolf Demon Tribe. With that, Koga leaves. Inuyasha picks up the scent of Sesshomaru and another demon in the skies above them, and sure enough, Sesshomaru's group have travelled to his mother's palace in the sky. Sesshomaru continues to question her about the Meido Zangetsuha, and his mother shows him a talisman left to her by Sesshomaru's father. The talisman has meido powers of its own, and unleashes a demon from the underworld. Sesshomaru's attacks have no effect on it, and it quickly eats Rin and Kohaku before escaping back through a portal to the underworld. Sesshomaru follows, even though his mother warns him not to risk his life for human children. In the underworld, Sesshomaru uses Tenseiga's healing powers to defeat the demon and save Rin and Kohaku. Kohaku quickly wakes up due to the power of the Shikon Shard, but Rin remains incapacitated. As more demons attack Sesshomaru tells Kohaku to carry Rin and run away. Kohaku does as he's told, but the path soon crumbles beneath him. Sesshomaru saves him from falling, but is told that Rin has stopped breathing. Sesshomaru tells Kohaku to set Rin down. He draws Tenseiga, but no demon's of the underworld appear around her in which to slay, restoring her to life. Without the demons to kill, Rin cannot be saved. A darkness passes over them and Rin's body disappears. Sesshomaru's mother's voice reaches him, she says that perhaps if he can kill the Guardian of the Underworld, then Rin will be restored to life. However, she thinks that this is impossible and uses the Meido talisman around her neck to open a portal to bring Sesshomaru and Kohaku back to he palace. Sesshomaru refuses to go through, but tells Kohaku to go back. Kohaku does not listen and follows Sesshomaru who has picked up Rin's scent in the distance. The pair find a gigantic demon surrounded by mountains of corpses clinging to Rin's lifeless body. The demon opens a portal that begins to pull the corpses into it. Sesshomaru reacts quickly and cuts the demon in half with Tenseiga, saving Rin. But even now, he cannot bring her back to life. Sesshomaru tosses Tenseiga to the ground and curses it, thinking that the sword was not worth losing Rin's life over. The remaining corpses begin to crawl toward Tenseiga, seeking its life restoring powers. Sesshomaru's mother comments to Jaken that Rin must have been saved by Tenseiga once before, for a person can only be saved from death by its powers once. Sesshomaru picks up Tenseiga and is bathed in a bright light along with all the corpses surrounding him. Jaken is shocked as a portal opens and Kohaku steps out of it along with Sesshomaru carrying Rin's body. As he sets her body down, Jaken begins to cry the tears that Sesshomaru cannot. Moved by this display, Sesshomaru's mother removes the talisman and places it around Rin's neck, restoring her to life. Sesshomaru stares in wonder as she wakes up. Soon the group departs, but as they go, Sesshomaru's mother tells Kohaku that he is like Rin, and that Tenseiga will not be able to save his life.
Episode 10: 悲しみに濡れる花
Kanashimi ni nureru hana (Flowers Drenched in Sadness)
Kanna walks through the field where Kagura died. She wonders to herself if Kagura is at peace now. Questioning things, she realizes she herself has what she has always had, nothing. At his lair, Naraku reflects on his final battle with Kikyo and studies the almost complete Shikon Jewel. There is a single speck of purity within it that he cannot taint, left there by Kikyo. Inuyasha and the others walk along on a sunny day. When Miroku asks to take a break Inuyasha chastises him. Eventually they settle into a nearby village surrounded by flowers. Inuyasha, Shippo and Kirara are all sickened by the scent of the flowers in bloom, but everyone else finds their smell lovely. That night, Inuyasha refuses to sleep for fear that he will dream of Kikyo. Kagome tries to comfort him, but suddenly they are interrupted by the sounds of the villagers outside. They open the door and witness the villagers being entangled by vines from the flowers. As Inuyasha saves them, they fall to the ground and turn to soil. Kao, the Flower Prince forces his subjects to sacrifices themselves and use their sorrow to feed his flowers. Suddenly Sango is overcome and passes out after envisioning Kohaku. Inuyasha wastes no time in using his Wind Scar to attack Kao, who disappears. After Miroku gives Kagome a demon repelling charm, Inuyasha and she give chase to find and kill Kao. Meanwhile, Kanna takes Kagura's fan and places it in a lake as a sort of burial. Byakuya watches her and relays a message from Naraku that she is to unleash her mirror on Inuyasha. After arriving at Kao's manor, Inuyasha is overwhelmed by his sorrow at the loss of Kikyo. Enveloped in vines, Inuyasha is pulled through the ground by a pool of blood and disappears. Kagome is unaffected by the power of the flowers because of the charm given to her by Miroku. However, she realizes that Inuyasha is within Kao's manor, behind a barrier she cannot penetrate. Inside, Kao is feeding off Inuyasha, who dreams of following Kikyo into the afterlife. Kagome uses her charm on an arrow to break the barrier and attack Kao through the sliding doors of his house. Firing arrow after arrow she manages to weaken him enough to waken Inuyasha, but leaves herself suspectible to the flowers vines. Inuyasha leaps to her rescue, finally cutting down Kao and destroying all the flowers. He admits to Kagome that he had been shouldering his sorrow at the loss of Kikyo and had not taken the time to acknowledge that everyone else was suffering as well. The next day, the group sets out and hears a mention of a bright light emanating from a nearby mountain. Upon finding a lake, they see that its surface has been turned into a mirror. Kanna's mirror lies at its center. Suddenly a demon emerges from the frame of the mirror and Kanna reappears at its side. The Mirror Demon creates its own Tessaiga, which instantly trains all of the demonic energy from the real Tessaiga. Everyone is left powerless under the tremendous attacks of the Wind Scar and Adamant Barrage, and are forced to retreat. Later, Kanna wanders the forest with the Mirror Demon, who picks a flower for her. Upon studying the flower, Kanna seems to continues to ponder the meaning of her life, and crushes the flower.
Episode 11: 神無の墓標
Kanna no bohyo (Kanna's Gravestone)
The group rushes away from Kanna and hides in a nearby cave as Miroku erects a barrier around the entrance to protect them. Soon however, Kanna, her Mirror Demon and Byakuya arrive outside. The Mirror Demon transforms its stolen Tessaiga red and breaks through Miroku's barrier before unleashing the Adamant Barrage on the group within. Miraculously the shards all miss, as if Tessaiga is still trying to protect them. Inuyasha begins to transform into his full demon form while still retaining his personality, as Tessaiga draws out his own innate demonic power for its own use in aiding him in battle. Inuyasha uses Tessaiga to hack and slash at the Mirror Demon to no use. All the damage he inflicts is instantly healed and transferred to Kanna herself, her own body beginning to crack in the process. After Inuyasha realizes this she cups her hands together and unleashes a blast of energy from the sky on Inuyasha, pinning him to the ground. With no other choice but to destroy the demon and kill Kanna in the process Inuyasha begins to attack again. Inuyasha realizes that he must cut through the Mirror Demon's Tessaiga, but as he attempts to do this, Kanna moves and puts herself in harms way, losing her hand and almost dying in the process. As Inuyasha finally destroys the false Tessaiga, Kanna relents and stands before Inuyasha. He refuses to kill her however and puts away his Tessaiga. Watching, Naraku curses Inuyasha's kindness and grips Kanna's heart, crushing it and making her explode. As she does, a shard of her body flies into Kagome's eye. Kagome is able to hear Kanna's last words, telling her that light will kill Naraku, and in a flash she sees that the corrupted Shikon Jewel still has a sliver of light within it. Mourning the death of Kanna the group finds her mirror and places it on the ground.
Episode 12: 珊瑚の想い 弥勒の覚悟
Sango no omoi Miroku no kakugo (Sango's Feelings, Miroku's Resolve)
Sango and Miroku battle against a Bone Demon and his daughter. The Bone Demon has been injured and seeks Sango's Hiraikotsu in order to strengthen himself. Inuyasha is a human due to the influence of the full moon, and is rushing to his friends aid with Kagome and Sango. The demon attacks using skeletons of his victims, and Miroku is forced to use his Wind Tunnel to absorb them. The skeletons are covered in a weak poison though, which aggravates his injury. Both he and Sango are swallowed up by the demon, and Miroku is forced once more to use his Wind Tunnel before passing out. With no escape left, Sango pours poison on Hiraikotsu and hurls it at the demon, as he eats it, it begins to kill him. Inuyasha arrives, transformed once more and uses the Adamant Barrage to finish off the demonic daughter. Hiraikotsu is destroyed, but Myoga tells Sango there is a sage nearby who can fix it. The group visits the drunken sage in the mountains, and Sango is forced to battle the numerous demon's whose bones were used to create Hiraikotsu. The demons confront Sango, asking why she poisoned them after they had been with her through so many battles. Meanwhile, the Sage confronts Miroku about his own poisoning, offering up an antidote that will eradicate all feelings of pain associated with the Wind Scar sucking up poisons, however it will do nothing to treat his injuries. Miroku agrees and drinks the potion, passing out in pain. The demons that confront Sango feel Miroku's resolve to live and protect her and agree with her decision to protect him as well. Transforming into skeletons and then back into Hiraikotsu itself, Sango emerges from the jug with her boomerang intact. Thanking the Sage for restoring Hiraikotsu to its original form, the demon sage comments that it has actually transformed, but she would not learn the truth of its transformation until she uses Hiraiktosu in battle.
Episode 13: 完全な冥道
Kanzen no meido (A Complete Meido)
Sesshomaru's group is lead into a cavernous valley by a mysterious boy with no eyes. Everyone is worried that it is a trap except for Sesshomaru, who insists that if the boy tries to attack, he will simply slay him. Kagome picks up on Kohaku's shard and the group follows them. As the boy disappears, a man dressed in black wearing a half-mask appears and threatens Sesshomaru. The man is Shishinki and he claims that the Meido Zangetsuha was originally his technique, a technique he still wields, even better than Sesshomaru. As Inuyasha arrives, Shishinki reveals that Sesshomaru and Inuyasha's father battled him and injured his face before stealing the Meido Zangetsuha attack. However, when they fought, their father used Tessaiga rather than Tenseiga. Shishinki confesses that their father could not master the Meido, and so the ability out of Tessaiga in Tenseiga, which was originally part of Tessaiga itself. Enraged to learn that his father has betrayed him yet again by giving him a sword that was created only to house an unwanted technique, Sesshomaru attacks Shishinki. Shishinki laughs and counters by throwing out dozens of small Meido Zangetsuha orbs. Sesshomaru dodges them all and Inuyasha rushes to fight alongside him. Tessaiga and Tenseiga pulsate in unison, and as Sesshomaru draws Tenseiga, he is finally able to unleash a completed Meido Zangetsuha orb. The attack overwhelms Shishinki, drawing him to hell. However, Sesshomaru is not satisfied, feeling betrayed by his father, and more embittered towards Inuyasha for getting Tessaiga than ever before.
Episode 14: 奈落の追撃
Naraku no tsuigeki (In Pursuit of Naraku)
Byakuya learns of Sesshomaru's battle with Shishinki by visiting the battleground and communicating with rock spirits. Meanwhile, Sesshomaru goes to visit Totosai to learn the truth about Tenseiga. While he is away, Naraku arrives to take the final Shikon Jewel shard from Kohaku. Kohaku manages to escape only because as Naraku touched his shard, the speck of purity within his almost completed Shikon Jewel protected Kohaku. The light of purity was placed by Kikyo in her final act before dying, however Naraku plans to take the shard no matter the cost. Meanwhile, Sesshomaru explains to Totosai that he knows it was his father's intention for him to master the Meido Zangetsuha only to allow Tenseiga to be re-absorbed into Tessaiga. Totosai agrees and encourages Sesshomaru to give up his hatred for Inuyasha and his desire for Tessaiga. Inuyasha and the others watch Naraku chase after Kohaku in the distance and rush in to protect him. Unfortunately, Byakuya appears and blocks their way. As Inuyasha uses the Wind Scar, Byakuya counters by exposing the group to miasma. Miroku uses his newly acquired immunity to pain to absorb all the deadly poison, even though it will bring him closer to death. As Naraku continues to chase Kohaku, Rin and Jaken he floods the forest with miasma, tainting Kohaku's shard and bending him to his will. Kohaku sends Rin away as he attempts to face Naraku on his own. However, Sango arrives in the nick of time and quickly disarms Kohaku. As she throws her Hiraikotsu it unleashes a poison that eats through Naraku's body upon impact. Unable to reform himself, he is forced to flee. Kagome and the others arrive in time to make sure Kohaku, Rin and Jaken are all safe. After the battle Kagome purifies Kohaku's shard again and realizes that even in death, Kikyo is keeping the boy safe.
Episode 15: 正統なる継承者
Seitounaru keishousha (True Heir)
Sesshomaru meets with Byakuya who gives him a shard from Kanna's Mirror Demon and tells him that by using it with Tenseiga, he will be able to absorb the power of Tessaiga. Sesshomaru returns to find Inuyasha and the others and shocks everyone by telling Inuyasha to prepare for battle. The two begin to fight, but the others attempt to interfere. Byakuya shows up and uses his illusion powers to transport Sesshomaru and Inuyasha to another realm so they can fight without interference. As they fight, Sesshomaru can absorb Tessaiga's abilities one after another. Inuyasha becomes a full demon as Tessaiga's power can no longer keep his demon blood in check. Finally, Sesshomaru uses the Meido Zangetsuha to send Inuyasha into the underworld. As Inuyasha fades away, Sesshomaru tosses Tenseiga into into the void as well, no longer wanting anything to do with his father's gift of a sword. As Inuyasha floats toward his death, Tessaiga begins to glow and shows him his own demonic vortex to cut through. As he does Tessaiga repowers itself. Naraku is watching and takes control of the abandoned Tenseiga, using it to attack Inuyasha with poisoned diamond shards from the Adamant Barrage. Sesshomaru looks on and intervenes, leaping into the Meido and grabbing back Tenseiga, using it to fight Inuyasha and purposefully letting his brother cut through the blade. As he does, Tessaiga gains the Meido Zangetsuha ability. Inuyasha sees a light and aims the new attack at it, creating a portal for he and Sesshomaru to return home safely. As they land back amongst their companions, Inuyasha learns the light he saw was Tenseiga showing him where to cut. The blade is restored but can only heal once more. Sesshomaru ignores it but Rin grabs it up and promises to give it to him when he's in a better mood.
Black Tessaiga OVA which had debuted after the end of Inuyasha and prior to Inuyasha: The Final Act.
Episode 16: 瞳子の結界
Hitomiko no kekkai (Hitomiko's Barrier)
As a child the priestess Hitomiko was visited by Naraku. He attempted to kill her, but her power was too much for him. Now he has returned and easily overtakes her with his spiderwebs. Even though she dies from her wounds, the villagers care for her so much that they are unable to grant her final wish, to decapitate her head from her body. Because of this, she is resurrected under Naraku's influence. However, with her great spiritual powers she is able to maintain some control of her consciousness, Naraku keeps her on a tight leash. Inuyasha, Kagome and the others arrive in the village and attempt to deal with the situation. Hitomiko erects a barrier that Inuyasha cannot break through, however when Kagome shoots it with an arrow, she is pulled to the other side and imprisoned by Hitomiko and Naraku. Naraku hopes that either Kagome will kill Hitomiko again, and the guilt of sentencing Hitomiko's soul to hell will corrupt Kagome, or Kagome will die at Hitomiko's hands and be out of his way permanently. Hitomiko continues to question Kagome about her name, and her hidden powers, telling her that she has not yet mastered the bow from Mount Azusa. Finally, Kagome realizes that she has untapped potential within her and can shoot an arrow that teleports in mid-air, missing Hitomiko and hitting Naraku instead. This frees Hitomiko and allows her soul to finally be at peace. As the group leaves the village, Kagome wonders if it is because of Kikyo that her true powers have been sealed away all these years.
Episode 17: 曲霊の邪念
Magatsuhi no janen (Magatsuhi's Evil Will)
The group heads back to the village, and Inuyasha tells Kaede of Kikyo's death. Kagome rests up and washes her school uniform as everyone recovers from their long battles. Inuyasha tells Kaede about Kagome's true spiritual powers being sealed away, and that she suspects Kikyo may have been the one to do it. Kaede disagrees and instead posits that it was the Shikon Jewel itself that sealed her powers. Meanwhile, two ogre's attempt to attack Sesshomaru now that he no longer has a powerful sword that can hurt them. Sesshomaru makes short work of them. In a cave nearby, Naraku talks to the Shikon Jewel. offering up his body to it in hopes that it will assist him in gathering the final shard. A light springs from the jewel and blows through Naraku's body, emerging from his back as a new demon. The demon rushes past Byakuya and hurries to Sesshomaru's location, intent on killing Kohaku and taking his shard. Arriving, the demon calls Sesshomaru weak and injures his arm, Kohaku tries to interfere in the battle, but his shard is defiled, and he passes out as a result. Just as the demon is about to finish off Sesshomaru Inuyasha and the others arrive to assist. Sesshomaru curses his half-brother's interference and insists on battling alone. Kagome looks at the new demon and as they make eye contact, she passes out. The demon reveals to everyone that he is Magatsuhi, the incarnation of evil within the Shikon Jewel. Sesshomaru transforms into his fully demonic state, but even like this he is no match for Magatsuhi. Captured and near death, Sesshomaru suddenly emits a light from the arm Inuyasha cut off so long ago. Magatsuhi explodes as a result and Sesshomaru reappears with both arms and a new sword of his own, the Bakusaiga. Magatsuhi's physical body is destroyed but his spirit escapes. Kagome wakes up but seems weaker from her contact with Magatsuhi.
Episode 18: 人生の一大事
Jinsei no ichidaiji (The Day of Days)
Kagome has nightmares of failing her entrance exams, but as she wakes up, she realizes she is still in the feudal era. Everyone asks her if she's feeling okay after passing out when after making eye contact with Magatsuhi. Kagome recovers and attempts to purify Kohaku's shard only to learn she has lost her miko powers entirely. After receiving a scabbard from Totosai he sets out to do battle with Magatsuhi, as he is the only one who can slay him, using Tenseiga. Sesshomaru commands that both Rin and Jaken stay behind in Kaede's village. With no powers to help, and nothing that anyone can do until Sesshomaru kills Magatsuhi, Kagome goes back to her own time to prepare for her high school entrance exam. Once she arrives back home, she finds that her entire family has gone to a hot spring, while her friends are all off doing their own thing. With nothing to do, Kagome feels lonely until Inuyasha shows up later that night. Happy to see him, the two almost share a kiss before the rest of her family comes back. Ten days later, Kagome prepares to for her exam and has a difficult time making it to her test site with her exam pass. Thanks to Inuyasha and her mother she finally makes it to the test.
Episode 19: 琥珀の欠片
Kohaku no kakera (Kohaku's Shard)
Kagome calls her mother to tell her about the results of the test. They agree to have a huge feast to celebrate, which Inuyasha ends up ruining by bringing pigeons, carp and smashing the kitchen sink with his Tessaiga. Meanwhile, in the feudal era, an army of demons attack Kaede's village, Miroku rushes outside to use his Wind Tunnel to suck them up but quickly realizes that the entire attack was a trap for Magatsuhi to get near Kohaku. Miroku heads back into Kaede's house to find that Kohaku has awoken, possessed by Magatsuhi. Rin tries to approach him but is knocked back by his evil aura. Sango tries to help but is wounded by Kohaku's blade. Miroku tries to intervene and absorbs Magatushi's spirit, or so he thinks, however nothing seems to come of it, except to spread the poisonous wound within Miroku's body. Not only that, but now his Wind Tunnel has torn open and is on the verge of absorbing him. Inuyasha and Kagome return from the modern era to find the wreckage, their injured friends and Kohaku gone. Sesshomaru has followed Magatsuhi's scent, but only finds Byakuya, who keeps him distracted long enough to allow Magatsuhi's raid on the village. Inuyasha and Kagome rush to save Kohaku and stop him before he returns to Naraku. However, in fully possessed by Magatsuhi, things look bad. Sango arrives soon after riding Kirara and learns that her brother has been reliving the night he murdered his father and clan over and over in his mind. Tortured inside his own mind, Kohaku is on the verge of breaking down completely, however he follows one of Kikyo's soul collectors and sees his sister watching over Miroku. The siblings talk and Kohaku regains control over his body, deciding to leap into a valley, committing suicide so that Sango and Miroku can get his shard and keep it from Naraku.
Episode 20: 四魂の玉が完成する時
Shikon no tama ga kanseisuru toki (When the Jewel Is Whole)
The battle against Magatsuhi continues until Sesshomaru arrives and uses his Tenseiga to quickly dispatch the demon's presence. Magatsuhi curses the group and swears that he cannot be defeated. At that, the part of him that had been absorbed into Miroku's Wind Tunnel leaves Miroku's body, allowing the monk to wake up. As Naraku's tentacles emerge on the battlefield to get at Kohaku, Sesshomaru uses the Bakusaiga to cut them mercilessly. He then realizes that Rin may be in trouble back at the village and rushes off to check on her. After he leaves, Naraku makes his presences felt and grabs Kagome, holding her hostage in exchange for Kohaku's shard. Kohaku finally relents and allows Naraku to take him. As Naraku floats into the sky carrying both Kagome and Kohaku, Kohaku reaches into his shirt and pulls out one of Kagome's arrows that she had dropped. He rams the arrow into Naraku's body and the Kikyo's light that remained within his shard begins to purify Naraku. Naraku has no choice but to drop Kohaku. Inuyasha wastes no time in using his Adamant Barrage to save Kagome as the remains of Naraku retreat into the clouds. Sango and Kohaku celebrate his seeming victory, and Kagome thanks him for saving his life. Everyone is overjoyed at Kohaku's ingenious method of attack when suddenly, a small piece of Naraku's flesh rips through Kohaku's throat, stealing the Shikon Shard away from him. Kohaku collapses instantly, dead. Meanwhile back at Kaede's village, Rin is acting strangely, Jaken follows her to the woods, but it stopped as the little girl climbs onto the back of a demon and flies away. Sesshomaru arrives too late to save her and realizes that Magatsuhi has possessed her. As Jaken, Miroku and Shippo watch, he rushes off to save her. Back on the battlefield Sango and Kagome are in tears over Kohaku. Sango clings to her brother's corpse as Inuyasha curses Naraku in a fit of rage. Above in the clouds, Naraku has gained the completed Shikon Jewel, completely tainted with no trace of Kikyo's light. Inuyasha uses his Meido Zangetsuha on the clouds, feebly attempting to attack Naraku. Naraku laughs and leaves the group as the sun rises at dawn. Suddenly, Kohaku's body begins to glow and he wakes up. Everyone realizes that the light from his Jewel shard, placed by Kikyo, stayed with him rather than with the shard. As her last act, Kikyo believed it was more important to save Kohaku than destroy Naraku.
Episode 21: 奈落の体内へ
Naraku no tainai he (Inside Naraku)
Naraku recalls his creation after Onigumo offered himself up to demons to gain Kikyo and kill Inuyasha. As he remembers his past, he finally absorbs the Shikon Jewel into his body, instantly healing all the damage from his battle with Inuyasha, Sango and Sesshomaru. In the present, Kagome learns that she will be graduating and going to high school on a wait list. Everyone is thrilled for her. And she attends her graduation ceremony with Eri, Ayumi, and Yuka. Hojo tries to give Kagome a button from his school uniform as a goodbye present, but she runs off before he can. Heading home to travel back to the past, Grandpa gives her some presents for graduating and her mother hugs her goodbye, telling her to be careful. In the feudal era everyone sees a dark cloud forming on the horizon from Kaede's village and set off for the final battle with Naraku. Inuyasha tells Shippo that he cannot go, and that if they die in battle, he will have to be the one to avenge them. Shippo is about to protest when Inuyasha knocks him unconscious and leaves. Flying through the cloud they see that Naraku has transformed once more and now resembles a huge spider. Byakuya is waiting outside and teases the group. Sesshomaru rushes past and heads inside Naraku to save Rin. The rest quickly follow. Inside, Naraku taunts them by emerging from the walls, informing them that everything surrounding them is a part of him. He sends armored versions of himself to fight Inuyasha, who's Tessaiga seems useless against them. Sango manages to depcapitate one, but it quickly regrows a head and the head grows its own body. Soon the group is seperated, with Sango, Kirara and Miroku together and Inuyasha and Kagome on their own. Kagome uses what's left of her limited spiritual abilities to sense out the completed Jewel so that they can get it back from within Naraku, but as they move toward it, Inuyasha transforms into his fully demonic state and begins to attack Kagome, finally knocking her away into a dark chasm.
Episode 22: 奈落 闇の罠
Naraku yami no wana (Naraku: Trap of Darkness)
Kagome awakens at the bottom of the pit where she had been pushed by Inuyasha. She finds that Sesshomaru is next to her, killing the demons that try to attack her. Inuyasha wanders aimlessly and attempts to fight off his demonic urges. He remembers the death of Kikyo due to Naraku's manipulation, and suddenly recalls his attack on Kagome as well. Separated from the others, Sango and Miroku wander in search of Naraku. Sango can hear the wind blowing from Miroku's Wind Tunnel, even as it is covered. She knows that he does not have much time left. Naraku manipulates them and shows the pair the death of Miroku's father when his own Wind Tunnel enveloped him. Miroku is unphased by this but the sight of Miroku's Father's death shocks Sango to the point of tears. Naraku attacks the pair and forces Miroku to open his Wind Tunnel to protect them. Miroku knows that when his hand finally tears open Sango will be at risk too and so he bids her farewell and runs off to die alone. Sango tries to follow on Kirara but cannot find him. Meanwhile Inuyasha finds Rin who is being followed by Magatsuhi. Magatsuhi possesses Inuyasha and prepares to kill Rin just as Sesshomaru and Kagome arrive and hold him off. Inuyasha tries to fight Magatsuhi's influence by is overpowered. He uses Tessaiga to create a Meido Zangetsuha. While in Kaede's village everyone watches Naraku hovering in the sky. Shippo and Jaken begin to fight over the fact that Jaken did not join Sesshomaru in battle, when Kohaku interrupts them and all three head up to find their friends on Aun. The Meido Zangetsuha that Magatsuhi unleashed rips a hole in Naraku's body allowing them to enter. Sesshomaru disarms Inuyasha and prepares to kill his brother as Inuyasha regains himself momentarily and urges Kagome to throw Tessaiga back to him so that he can attempt to fight off Magatsuhi once more. She does and Magatsuhi is driven out. As he attempts to possess Kagome, Sesshomaru uses Tenseiga to kill the demonic entity once and for all.
Episode 23: 奈落 光の罠
Naraku hikari no wana (Naraku: Trap of Light)
As Magatsuhi fades from existence, Kagome feels a pulse as her complete spiritual powers return to her. With the death of Magatsuhi a small dot of light returns to the Shikon Jewel. Naraku however, is not worried. Instead he uses the light as his next trap, creating multiple illusions of himself in an attempt to lure Miroku into using his Wind Tunnel for the last time. Seperated from the others, Miroku sees the false light and heads off in hopes of killing Naraku on his own, even at the cost of his own light. Inuyasha and Kagome rush to try and find him and stop him before he sacrifices himself for nothing. Meanwhile, Sango has encountered another false Naraku, however he holds captive the real Rin. Sango must choose whether or not to hurl her Hiraikotsu in hopes of killing Naraku to save Miroku, but at the cost of Rin's life. As Kohaku looks on, she makes her choice and tosses her boomerang. Just as this happens, Inuyasha and Kagome rescue Miroku before he can use his Wind Tunnel and Kagome uses her spiritual powers to shoot an arrow at the real Naraku. Naraku is injured enough that his illusions fade, and Rin falls just in time to miss being hit by Sango's Hiraikotsu. Kohaku saves the girl, but Byakuya comments that Sango was willing to kill her, making sure Sesshomaru overhears this. He glowers but does not act. Sango begs him to wait to kill her until after Naraku has been defeated. Sesshomaru seems fine with the delay. Everyone heads off as Naraku's body falls apart around them, while Byakuya sneaks off to draw his sword. Inuyasha attempts to kill Naraku with a Meido Zangetsuha, but misses. Shippo watches as Byakuya absorbs the energy of the Meido into his sword for a one-time-only use.
Episode 24: 奈落 儚き望み
Naraku hakanaki nozomi (Naraku's Uncertain Wish)
On the ground below Naraku, Totosai and Myoga look to the sky. Totosai comments that Inuyasha must learn the final form of the Meido Zangetsuha to defeat Naraku once and for all. Inside, Inuyasha, Kagome and Miroku make their final stand against Naraku as Sango rushes ahead of Sesshomaru, Kohaku and Rin to reach her friends. Meanwhile Shippo and Jaken are on their own. Naraku floods his entire body with miasma, and it begins to effect Sango and Shippo. Shippo carries antidotes from Jinenji and perserveres to reach the rest of his group. As Sango finally reaches her comrades, she hurls the Hiraikotsu and breaks through Naraku's shield, seriously wounding him. But Naraku counters by blasting her with a powerful stream of miasma, knocking her and Kirara unconscious. Miroku dives to save her, but she falls through a hole in the floor, and Miroku follows. Now only Kagome and Inuyasha remain with Naraku. Inuyasha curses his foe as he tries to use the Meido Zangetsuha to no effect. The attack simply passes through him. Kagome tries to reason with Naraku, telling him that she knows the Shikon Jewel did not grant his true wish. That he wanted what he fought most against, companionship. That it was only because he knows loss and suffering that his heart was so dead set against others benefiting from friendship and love. Naraku laughs and begins to absorb the Shikon Jewel into his body, gaining even more power. Separated from the others, Miroku waits with the unconscious Sango, wondering what to do. She wakes up long enough to beg him to take her with him into his Wind Tunnel. Miroku cannot do this, however. As Sesshomaru gets closer, he notices the flood of miasma and realizes that Naraku is getting desperate. With one cut he unleashes his Bakusaiga and deals the final blow against Naraku, and endless wave of cuts that will not stop until Naraku is gone. Inside Inuyasha and Kagome prepare to fight back and Inuyasha uses the black Tessaiga to unleash the final form of the Meido Zangetsuha in multiple cutting blades. Naraku is seriously injured yet again, and Kagome prepares to shoot him and purify his soul with an arrow, as Naraku clings to life. However, Byakuya appears and cuts Kagome with his sword. Inuyasha wastes no time in sending Byakuya to the afterlife with the Meido Zangetsuha, but the demon has no regrets, he has served his purpose. Kagome seems fine however, unaffected by his attack. Meanwhile, the weakened Miroku and Sango literally fall on top of Shippo and his uses his antidotes to revive them. Back to fighting strength, the group pushes higher to find Inuyasha and Kagome. Sesshomaru, Kohaku and Rin arrive to and the entire assembled group prepares for the final assault against a weakened Naraku.
Episode 25: 届かぬ想い
Todokanu omoi (Thoughts Fall Short)
As the group begins their attack on Naraku, Sesshomaru orders Jaken to take Kohaku and Rin away from the battle. His Bakusaiga's attack has caused Naraku's body to continually fall apart. But Naraku completely merges with the Shikon Jewel and transforms one final time. Everyone's attacks seem to fall short, even though Naraku knows he is near death, he is still defiant. He blasts the group with fatal chunks of his body, coated with his miasma, and they all do their best to avoid the attack, Outside, his huge body is disintegrating, but moving slowly toward Kaede's village. In his final moments, Naraku reveals that his true wish was to have Kikyo's heart, a wish he will not be granted. His body finally crumbles just outside the village as Kagome shoots the the Shikon Jewel with an arrow, piercing it once more. Everyone escapes safely and stands near the Bone-Eater's Well only to find Naraku's head and the Shikon Jewel with Kagome's arrow through it floating above the well. The Jewel forces Naraku to make one final wish, the Jewel's own wish, and with that, he dies. Miroku checks his hand and realizes that the curse of the Wind Tunnel has been broken and that Naraku is dead, when suddenly a Meido portal opens behind Kagome and sucks her inside it. Inuyasha rushes after her but is too late, Kagome disappears. Everyone is shocked as they notice that not only Kagome, but the Bone-Eater's Well itself is gone. In the modern era, Sota encounters Eri, Yuka, and Ayumi who are wearing their new high school uniforms. They ask if Kagome is still too sick to go to the entrance ceremony, and Sota covers for her. Suddenly, all four hear a strange sound from the shrine and rush inside. Sota is horrified to see that the Bone-Eater's Well has disappeared and calls for his mother and grandfather to hurry and come see. In the past, Inuyasha panics at the loss of Kagome and begs Tessaiga to take him to her. He uses the Black Tessaiga to create the Meido Zangetsuha and leaps inside to find her. Meanwhile, Kagome appears in an alternate world. She is just an average high school student who never met Inuyasha or had anything to do with the Shikon Jewel. She spends her time with her friends and has her first date with Hojo. But some things don't seem quite right. She asks the Sota about the shrine that housed the well, but he doesn't know what she's talking about. Finally, staring at the Goshinboku Tree, she wonders why there is no scar, and suddenly remembers Inuyasha. Upon remembering him, she is pulled out of the false world and is shown floating in the darkness with the Shikon Jewel. The Jewel speaks to her and tells her that she has no choice but to give in and live in the darkness forever. As Inuyasha tries to find her, he encounters numerous demons that say they will continue to battle against the "priestess" Kagome until the Shikon Jewel is reborn in the world again. Inuyasha fights against them and rushes to find Kagome, hoping that she will not give in to the Shikon Jewel and make a wish to save herself.
Episode 26: 明日へ
Ashita he (Toward Tomorrow)
Inuyasha desperately searches for Kagome inside the Shikon Jewel. As he battles demons he sees a bright light attacking the demons as well and learns that this is Hitomiko. The demons tell him that as soon as Kagome makes her wish, she will join the endless battle within the Jewel. Inuyasha swears that he will not let that happen, as he suddenly encounters a spider's web with Naraku's severed head in the middle. The demons tell him that Naraku is sleeping, but once Kagome makes her wish, he too, will awaken and fight against her. Inuyasha is more desperate than ever to find her and rescue her. As he continues to call her name, Kagome is in tears trying to decide what she should wish for. She knows that the right wish will destroy the Shikon Jewel forever, but she is terrified of being stuck in the darkness, alone, forever. Suddenly, she hears Inuyasha's voice, calling out to her. When she responds, he hears her and tells her not to make any wishes, that he'll find her. Suddenly, the Tessaiga transforms into the Black Tessaiga, and he sees a cut in front of him, as he slashes it with the Meido Zangetsuha, it opens a portal that takes him to Kagome. The couple embrace and kiss, and together, confront the Shikon Jewel. Kagome wishes for the Jewel to disappear forever, and it shatters once more before fading into non-existence. Midoriko puts her sword away as she too fades, along with all the demons. Naraku awakens briefly, remarks that he feels warm and at peace, as he too fades. Inuyasha and Kagome return to the present to find her family waiting for her, its been three days since she disappeared. As soon as she jumps out of the well to greet her family, Inuyasha is forced back into the past. Miroku, Sango and Shippo are all waiting for him, but shocked to see him return without Kagome. Three years pass, and Inuyasha rarely talks about what happened with Kagome, other than saying she had other people that needed her. Miroku and Sango have had twin girl's and Sango is just giving birth to their third child, a baby boy. Rin is living with Kaede and helping around the village. Shippo spends his time training at the Kitsune school, and Kagome in her own time, has finished high school. She thinks of Inuyasha often and as she stares into the Bone-Eater's Well, suddenly, at the bottom she can see the sky. Her mother arrives behind her, and knows that she must go. They say goodbye and Kagome jumps in. In the Feudal Era, Inuyasha catches Kagome's scent and rushes to the well, reaching in, he grabs her hand and pulls her out. Everyone else is happy to see her. As time passes, Kagome begins to train in medicinal herbs under Jinenji and Kaede. Sesshomaru visits Rin often and leaves presents for her, Koga and Ayame marry, Kohaku stays on his own with Kirara, hunting demons, while Totosai and Myoga assist him with weaponry. Sota grows up and enters junior high and continues to dote on his Grandpa. Kagome and Inuyasha are happy and vow to spend everyday together as the move toward the future.